What it is
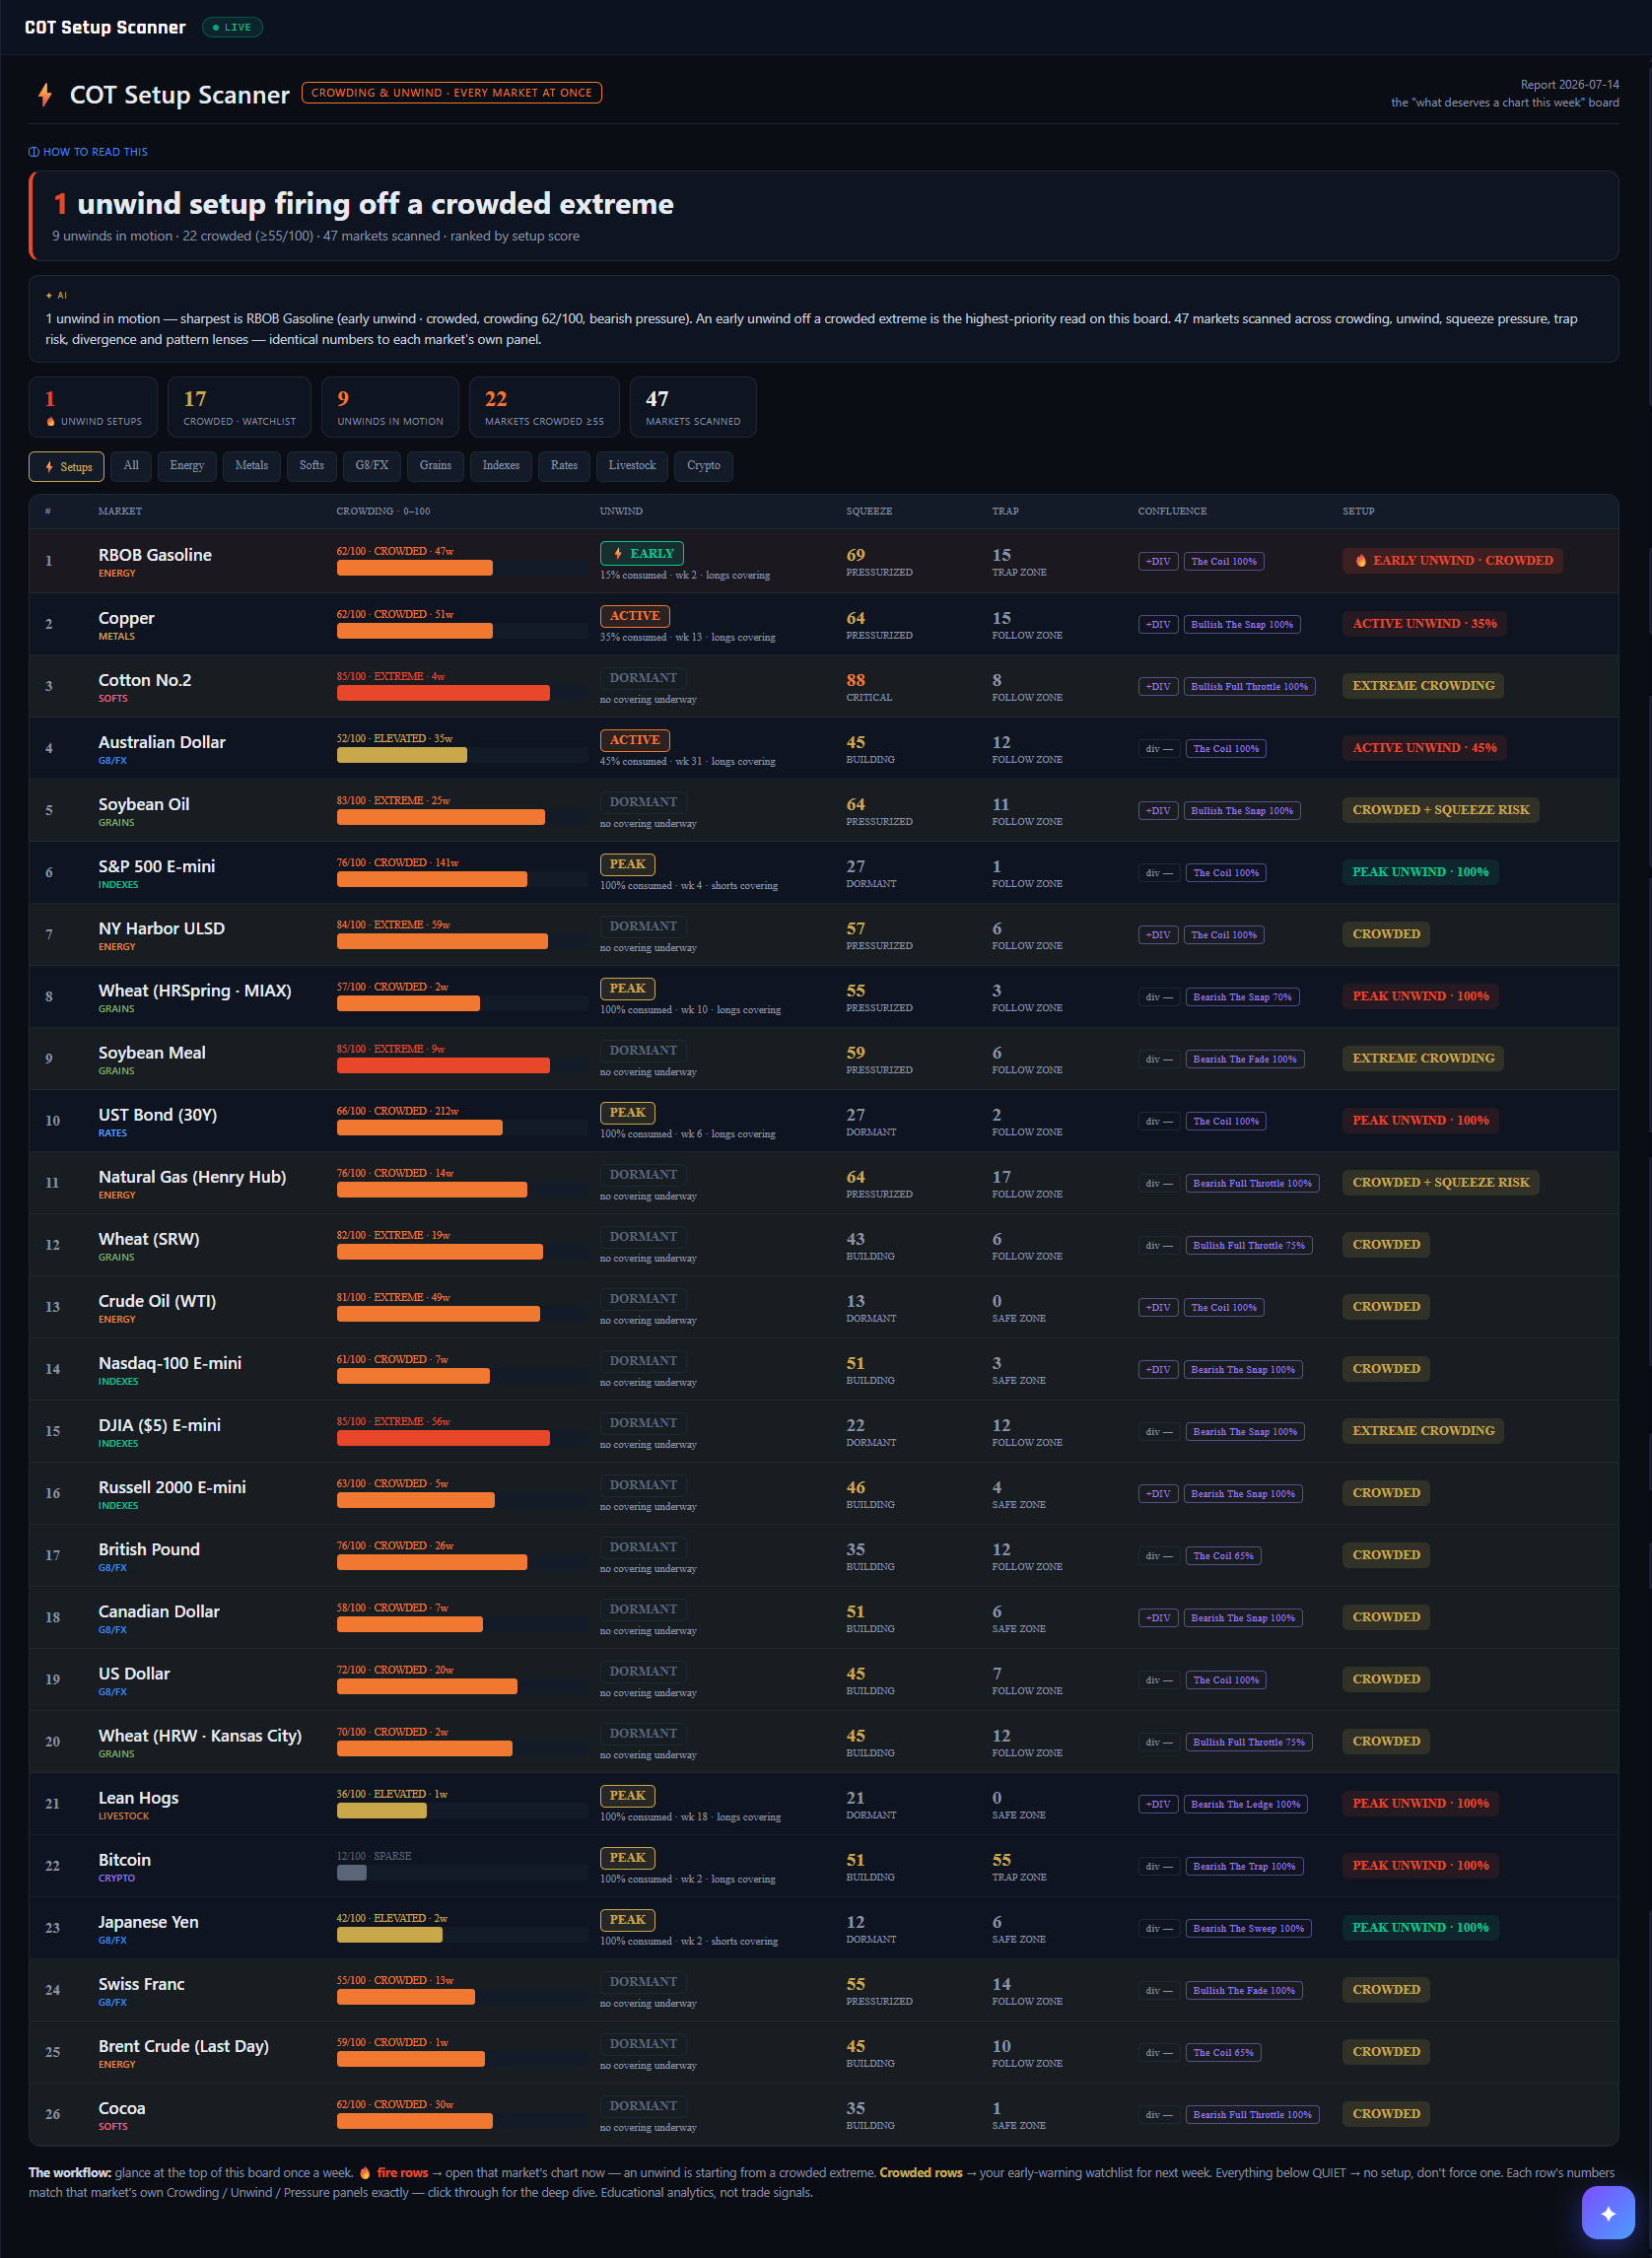
The board that answers “what deserves a chart this week?” Crowding, unwind, squeeze, trap risk, divergence and pattern each had a deep single-market panel — which meant a setup could be forming and you would never know unless you happened to click that market. This runs all 47 markets through all six lenses at once and ranks them.
What it measures
A composite setup score, weighted toward the two readings that matter most: crowding (0–100, how hard the retail crowd leans against the commercials) and unwind stage (DORMANT → EARLY → ACTIVE → PEAK). Squeeze pressure, trap risk, divergence and active pattern add confluence. Every number is pulled from that market's own canonical panel — never recalculated, so the board and the deep dive always agree.
Why it's useful to you
Crowding tells you a setup exists; the unwind turning EARLY tells you it has started. That distinction is the whole point of the board. A 🔥 fire row means covering has just begun off a crowded extreme — the moment to open that market's chart. Crowded-but-dormant rows are next week's watchlist, not today's trade.
The 10-second read
Look only at the top. 🔥 fire rows → open that chart now. Gold crowded rows → watchlist. Everything reading QUIET → no setup this week; don't force one.
Use it with: Crowding Meter · Unwind Tracker · Pressure & Squeeze
1
Panel identity. “Crowding & unwind · every market at once” — the scanner counterpart to the single-market Crowding and Unwind panels.
2
How to read this. Expands a full key: what the crowding score means, what each unwind stage means, and why a fire row outranks everything else.
3
Verdict banner. The headline count of unwind setups firing off a crowded extreme, with the supporting tallies beneath — unwinds in motion, markets crowded, markets scanned.
4
AI read. Names the sharpest setup in sentences, including its crowding score and pressure direction, and restates the priority rule so the board teaches while it reports.
5
Summary chips. Five counts at a glance: fire setups, crowded watchlist, unwinds in motion, markets crowded ≥55, and total markets scanned.
6
Class tabs. ⚡ Setups shows only what is flashing; All shows the full ranking; the rest filter by asset class. The board opens on Setups deliberately.
7
Crowding column. The 0–100 contrarian score with its state word and how many weeks it has held. The bar makes the level scannable without reading numbers.
8
Unwind column. The stage chip — here ⚡ EARLY — with percent consumed, week count, and which side is covering. EARLY is the trigger read; DORMANT means nothing has started.
9
Squeeze. How loaded the spring is, from the Pressure & Squeeze engine. High squeeze under a crowded position is what turns a level into a risk.
10
Trap. Where the market sits in its trend lifecycle. A high trap score means late-stage — the zone where crowds get caught.
11
Confluence chips. Extra agreement from two more engines: +DIV when price and positioning are diverging, plus the active pattern and its confidence.
12
Setup verdict. The synthesised call. 🔥 EARLY UNWIND · CROWDED is the highest-priority read on the board — covering has begun from a stretched position.
13
The workflow footer. The weekly routine in one line: fire rows now, crowded rows next week, quiet rows ignored. Every number here matches that market's own panel exactly.